Introduction
One may need a hose bib in their garage for many reasons. However, the process to install is a complex one.
So, how do you install a hose bib in a garage?
You need the set of right tools to set up a hose bib and a few steps. First a water supply has to be arranged and then the hose bib attached to the garage wall. After this the fittings have to be installed, assembled and the joints sealed.
But that is not all, read through to read more about which hose bib you need and how to set them up.
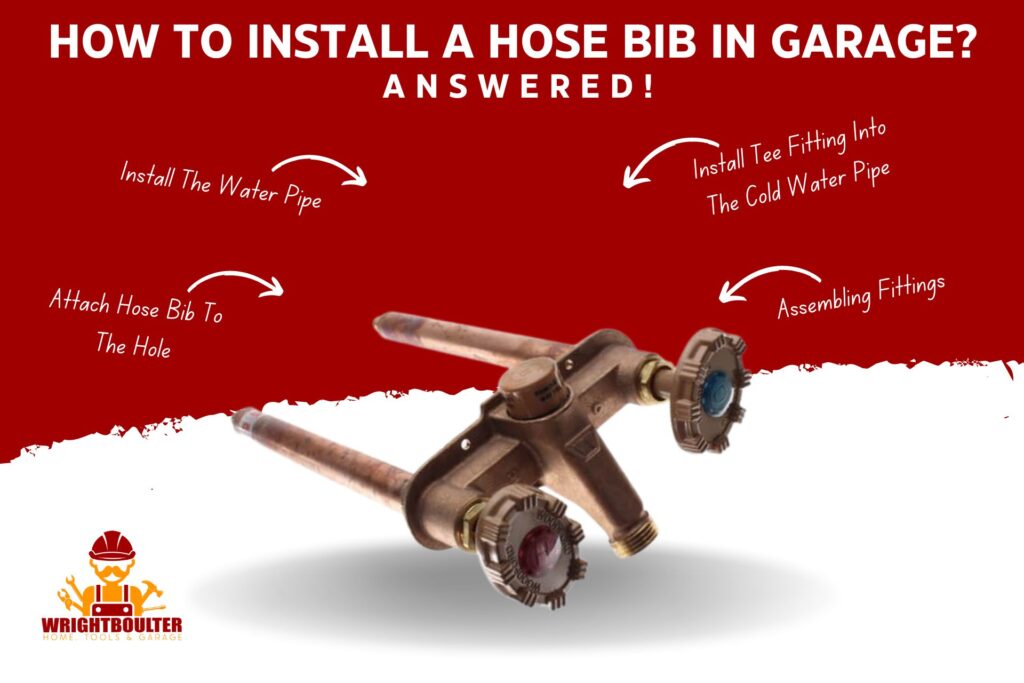
How to Install A Hose Bib In Your Garage; Step-by step Guide
You may have a few questions after building a garage, like how to wire garage lights in series or how to install a hose bib. Installing a hose bib is a complicated procedure and is only advisable to do if you have a professional level of expertise.
Required Tools:
- Carpenter’s square
- Drilling machine
- Spade bit
- Plastic gasket
- Screwdriver
- Caulk gun
- Hose bib
- Wrench
- Silicone caulk
- Deck screws( Rust Resistant)
- Pipe and fittings
- Saw
- Flux
- Solder
- Pipe-thread tape
- Tools for working with pipe
Additionally, here is a list of popular hose bibs on the market for you to choose from.
| Hose bib | Price |
| Woodford V22CP-6-MH Vertical Hot and Cold Wall Faucet | Check price on Amazon |
| Woodford 22PX-12-MH Horizontal Freezeless Faucet | Check price on Amazon |
You need to make sure the installation follows plumbing code requirements. Moreover, having the right tools for the process is also absolutely essential.
Step 1: Install The Water Pipe
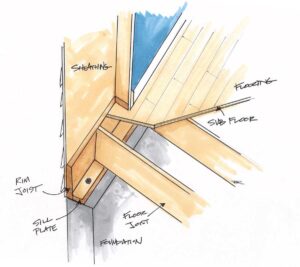
Locate a point above the cold water pipe and drill a hole using the drilling machine and a thin and long drill bit. You have to drill through the rim joist as well as the sheathing.
Know where they are located in your garage as shown below. To avoid splinters or cracks in the siding, first drill from inside to out and then outside in.
Once you finish drilling the hole, insert a water pipe and connect it to the cold water pipe. This will be the source of water for your hose bib.
 Source: Nature of Home
Step 2: Attach Hose Bib To The Hole
Insert the hose bib through the hole and fit in the plastic gasket over it from the outside. Coat the rim of the hole with silicone caulk and seal the hose bib using deck screws.
Step 3 : Install Tee Fitting Into The Cold Water Pipe
Locate the position on the cold water pipe where the tee fitting will be installed, and mark it. Turn off the water supply and cut the water pipe at the marked point using a saw.
Make sure the cut is straight. Place the tee fitting inside the cut in the pipe and fix it in place using a wrench.
Step 4: Assembling Fittings
At first check if a pipe nipple and elbow fit the tee fitting, by dry-fitting. Next check if another pipe nipple, adapter and shutoff fit with the plumbing, by dry-fitting. It has to be made sure that the hose bib slopes in the downward direction.
This is done so that water drains off and doesn’t freeze. Lastly, position the final pipe nipple in the shutoff valve. Then mark where it has to be cut later on for installation.
 Source: Better Homes and Gardens
Step 5: Sealing The Joints
The last step involves disassembling the shutoff valve completely. Next, use a fiber-shield to cover the wooden framing in the surroundings. After this, use a solder and propane torch to sweat all the joints.
Frost Free Hose Bibs
If you live in very cold climates, only then consider getting a frost free hose bib.
Moreover, in comparison to its alternatives, these faucets are highly expensive.
Below are some alternatives to the frost free hose bib that you might want to consider for their advantages.
- Install a ball valve on the water line supplying water to the hose bib.This will enable the user to drain the hose of any water in winter and prevent freezing.
- Globe valve:This valve too, can cut off water supply to the hose bib, help in draining it completely so it doesn’t freeze in winter.
- Insulate the hose bib: Wrap the hose bib with insulation and use duct tape to secure the insulation. This will prevent water freezing in the hose bib.
Hot And Cold Mixing Hose Bibs
Hot and cold mixing hose bibs are desirable to many users because they prevent water freezing. Additionally, people use these hose bibs to wash their pets too.
However, hot and cold mixing hose bibs are generally more expensive than conventional ones. Hence you might want to consider its alternatives.
You can choose to install a Delta 1300 shower valve in the garage and connect a hose thread to the showerhead side of the valve. This would enable mixing of hot and cold water.
If you do not want to do any plumbing, a utility sink is a very good option as well. You can let your hot and cold water supplies run into the utility sink and perform washing there.
FAQs
How Much Does It Cost To Get A Hose Bib In Your Garage?
If you don’t need to run a new water line to your hose bib, the materials and labor cost will be $100-$200. Otherwise, it can cost $3000 or greater for materials and labor. The cost of installing a hose bib in your garage is the sum of materials, labor and parts cost.
What Is The Difference Between Hose Bib And Hydrant?
A hose bib is a faucet that is attached to a house’s water supply and is used to connect a garden hose. A hydrant is a larger, more robust faucet that is typically found on the street and is used to connect fire hoses.
Does A Hose Bib Reduce Water Pressure?
Yes, a hose bib can reduce water pressure. The hose bib is a valve that controls the flow of water from the main water line to the garden hose. When the hose bib is closed, it restricts the flow of water, which reduces the pressure.
Conclusion
That is all you needed to know about installing a hose bib in your garage. We hope you do not have any doubts about the process after this detailed analysis. Follow the instructions to do it yourself. All the best!

